Information
Epson Intelligent series printers are considered to be the most flexible when it comes to printer thermal receipts from many different devices and platforms
Windows, MacOS, Android, iOS, etc... will allow direct communication with the printer via a network IP address.
Note: This guide assumes that you have already setup an applicable intelligent printer. If you still need to setup a master folling this guide: EPSON TM Series Intelligent Printer Setup - Master (Ethernet)
Supported Models
- Most TM Series Ethernet Printer (Intelligence is not required for slaves)
Overview
The below process covers the steps required when attaching a slave printer to an existing Epson Intelligent Printer via Ethernet
Process
Ascertain your network IP address range (Windows)
- Click Windows start menu
- Type CMD into the search box
- Click CMD icon (or Command Prompt)
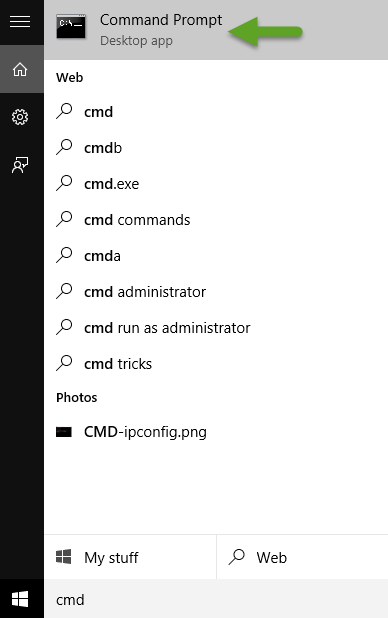
- A new command prompt window will appear
- Type IPCONFIG and click enter
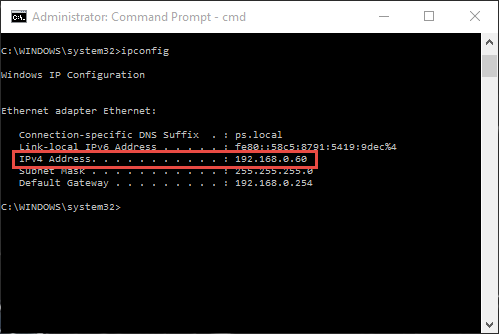
- Make note of your IPv4 address, subnet mask and default gateway to be utilised later in this guide.
- Close the CMD window
Verify default IP address of the printer
- Locate the small reset button on the back of the printer
- Using a pen or similar press the small button for 3 seconds and release
- Verify IP address is 192.168.192.168 (factory default)
If so, proceed onto section 'Configuring your PC to communicate with the printer for setup.
If the IP address is different and matches the same IP range of your network, you can skip 'Configuring your PC to communicate with the printer for setup' section.
Note: In the below example, the I.P range is 192.168.0. and indicates that both PC and printer are on the same network as the first 3 sequence blocks are identical.
e.g.. Your PC IP address is 192.168.0.55
The IP address of the printer is 192.168.0.90
Configuring your PC to communicate with the printer for setup
Note: The following steps are only required for the initial setup of the printer.
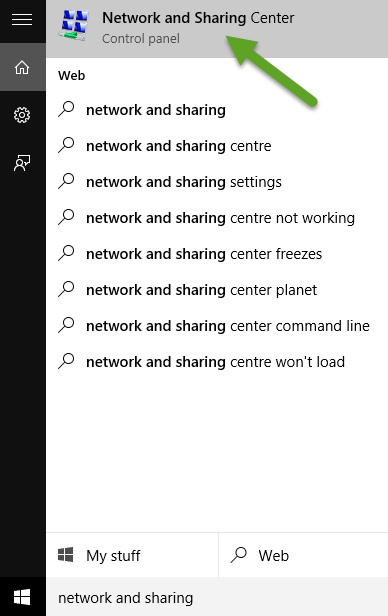
- Click Windows start menu
- Type Network and Sharing into the search box
- Click 'Network and Sharing Centre
'
- Click Change Adapter Settings
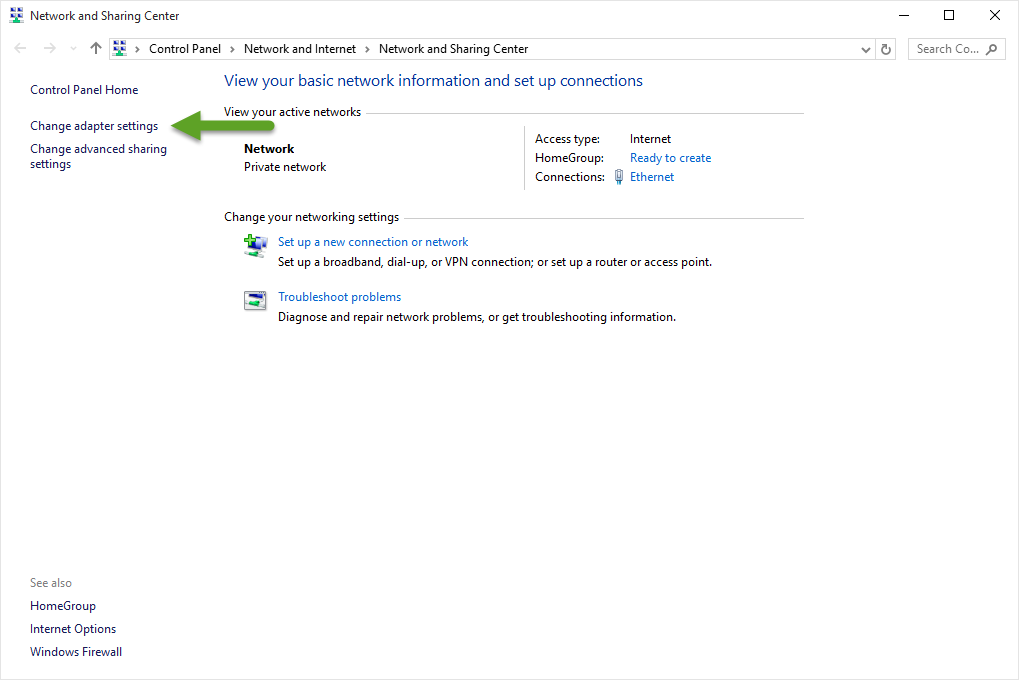
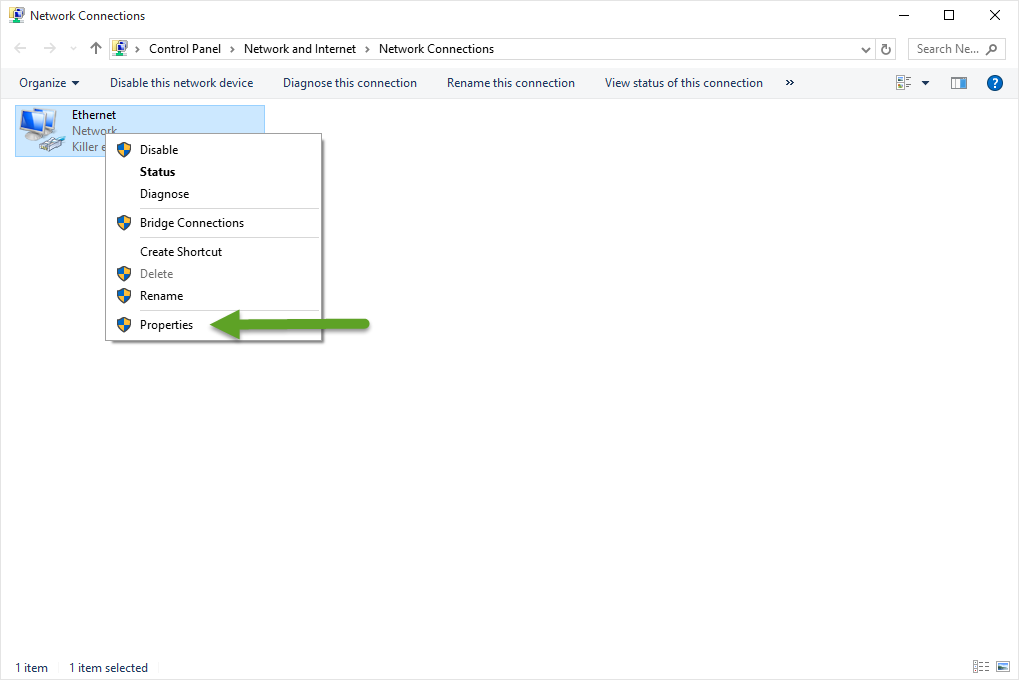
- Right click your network adapter
- Click Properties
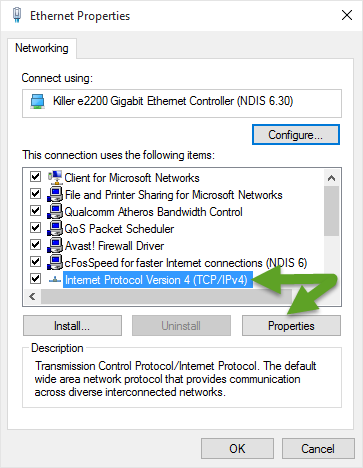
- Click Internet Protocol Version 4 (TCP/IPv4) and click Properties
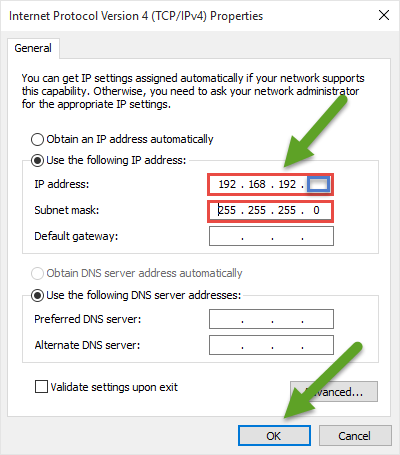
- Click 'Use the following IP address'
- Enter 192.168.192.X (X = any number you wish between 1 - 167)
- Example: 192.168.192.60
- Click into Subnet mask which will automatically populate with 255.255.255.0
- Click OK to save
- Your PC and Printer are now on the same range.
Connect your PC to the Printer via Ethernet cable
- Disconnect your PC Ethernet cable from the network
- Connect the PC network card directly to the printer via Ethernet cable
- Ensure Printer is turned on with no red lights flashing
Configuring a new IP address for the printer
- Open up your favourite web browser
- In the address bar enter the following address and click enter; 192.168.192.168
- When prompted for login credentials, enter epson into both username and password
- Click TCP/IP under Wired

- Enter the preferred ip address of the printer
- If your original IP address was 192.168.0.25, then you would enter an IP address in the same range.
- Also ensure that you do not use the same IP address as the master printer. Best to use the IP address that directly follows the master
- Example: 192.168.0.92 if your master is 192.168.0.92
- Enter the same subnet mask (usually 255.255.255.0)
- Enter the Gateway IP address of your router or server
- Click Submit to save

- Close the browser window
Set PC network card back to default IP address settings
- Click Windows start menu
- Type Network and Sharing into the search box
- Click 'Network and Sharing Centre
' - Click Change Adapter Settings
- Right click your network adapter
- Click Properties
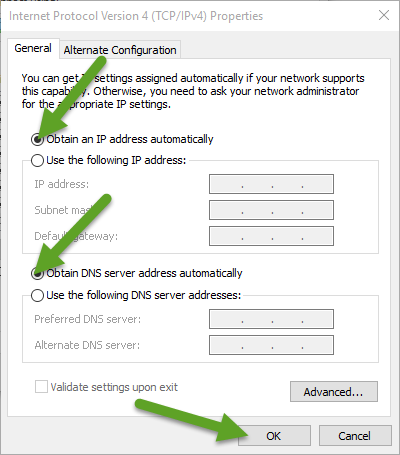
- Click Internet Protocol Version 4 (TCP/IPv4) and click Properties
- Set both sections back to obtain automatically
- Click to save
- Close all settings windows
Reconnect Ethernet cable back to router
- Disconnect the Ethernet cable from the printer
- Connect the PC Ethernet back to the router/switch
- Connect another Ethernet cable from the Printer to the router/switch
Verify Printer IP address change
- Open up your web browser
- Entering {New Printer IP} in the address bar
- Example: If you changed the printer IP address to 192.168.0.92, then your printer configuration address will be 192.168.0.92
- If you can access the page then the address change has been performed correctly
Attach Slave Printer to the Master
- Login to the master printers configuration page
- Example: if master is 192.168.0.91 then the address would be 192.168.0.91/PrinterConfigurationPage
- Click on Device

- Enter a name in Device ID (Can be anything you like. E.g.. Slave_Printer)
- Note: This is case sensitive
- Leave model as TM-T88v even if that is not the model
- Enter the IP address of the slave printer
- Click Register to save
- Close the window
Setup ClickPOS for Intelligent Printing
- Login to ClickPOS
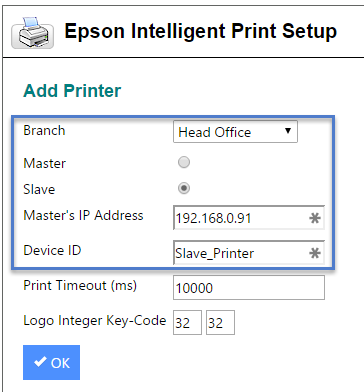
- Navigate to Maintain > System Admin > Epson Intelligent Print
- Select the relevant branch
- Select Slave
- Enter the IP Address of the Master printer (not the slave)
- Enter the Device ID exactly as you named it (case sensitive)
- Click OK
- Slave printer is now setup
Verify Printer is visible and test in accordance
- Navigate to Sale > Sell Product
- Open the Printer selection panel and verify the printer is displaying
- Do a test print to verify it is working correctly.
