Information
Epson Intelligent series printers are considered to be the most flexible when it comes to printing thermal receipts from many different devices and platforms
Windows, MacOS, Android, iOS, etc... will allow direct communication with the printer via a network IP address.
Note: this is applicable to the master intelligent printer only, please view EPSON TM Series Intelligent Printer Setup - Slave (Ethernet) for information in relation to setting up a slave printer.
Supported Models
- TM-T88VI-i (2017 Release)
- TM-T88V-i
- TM-T70II-i
- TM-T20II-i
- TM-T82II-i
Overview
The below process covers the steps required when setting up an Intelligent printer for the 1st time.
Please note: There are several steps to cover which would be considered moderate to advanced. Please consult your network administrator before proceeding.
A. Ascertain your network IP address range (Windows)
Automated Method - Try this 1st
- Ensure printer power is in the OFF postion
- Ensure the printer has all relevant cables connected. (Power supply & Ethernet RJ45 connected to the router)
- Turn the power switch the on position and wait for a response from the printer
- The printer will print a small stub of information. It will indicate the IP Address assigned to the printer by the network. Make note of the IP Address.
- Proceed to B. Configuring a new IP address for the printer (if applicable)
Note: If the printer fails to provide an IP Address you will be required to use the below manual method.
Manual Method - Try this if automated method does not work
- Click Windows start menu
- Type CMD into the search box
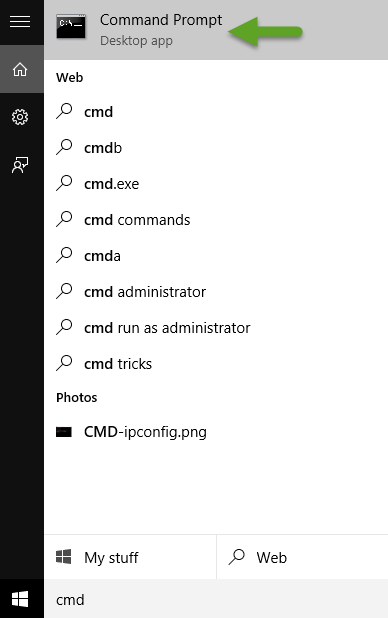
- Click CMD icon (or Command Prompt)
- A new command prompt window will appear
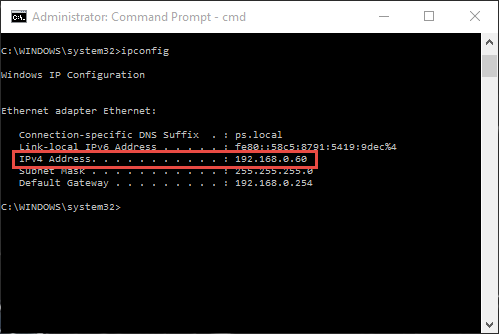
- Type IPCONFIG and click enter
- Make note of your IPv4 address, subnet mask and default gateway to be utilised later in this guide.
- Close the CMD window
Verify default IP address of the printer
- Locate the small reset button on the back of the printer
- Using a pen or similar press the small button for 3 seconds and release
- Verify IP address is 192.168.192.168 (factory default)
If so, proceed onto section 'Configuring your PC to communicate with the printer for setup.
If the IP address is different and matches the same IP range of your network, you can skip 'Configuring your PC to communicate with the printer for setup' section.
Note: In the below example, the I.P range is 192.168.0. and indicates that both PC and printer are on the same network as the first 3 sequence blocks are identical.
e.g.. Your PC IP address is 192.168.0.55
The IP address of the printer is 192.168.0.90
Configuring your PC to communicate with the printer for setup
Note: The following steps are only required for the initial setup of the printer.
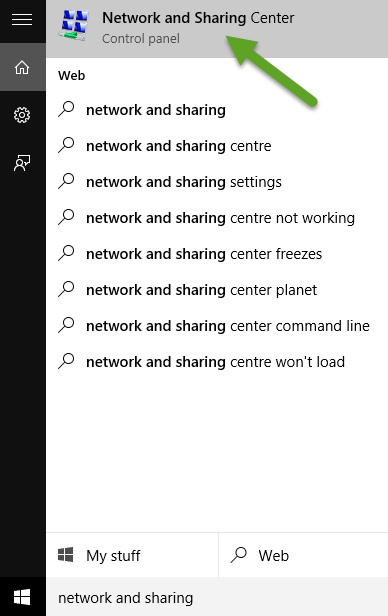
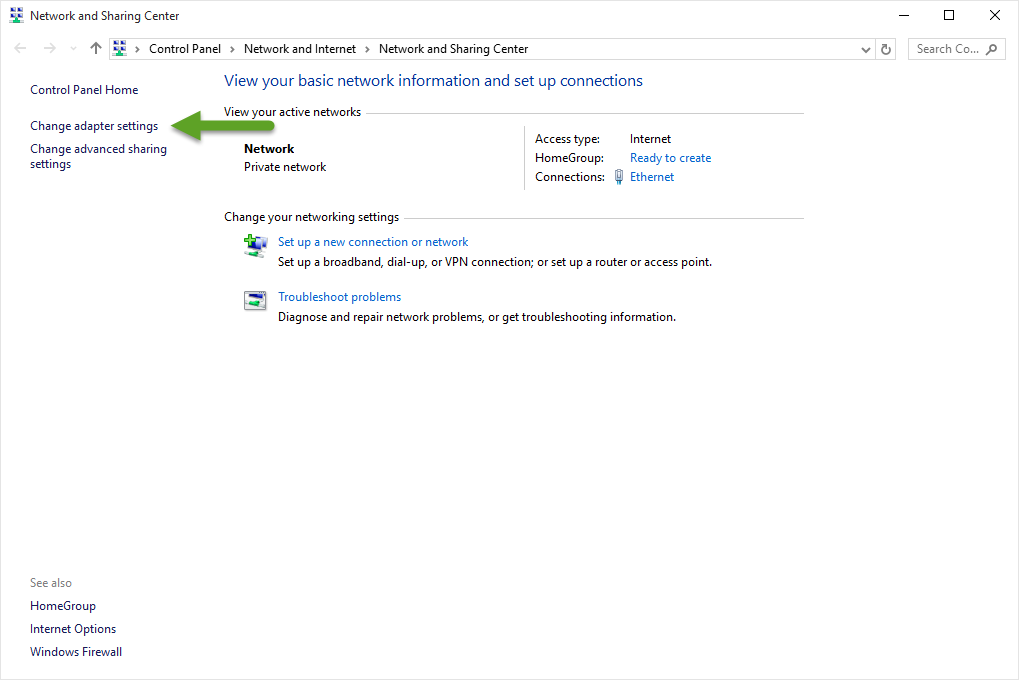
- Click Windows start menu
- Type Network and Sharing into the search box
- Click 'Network and Sharing Centre
- Click Change Adapter Settings
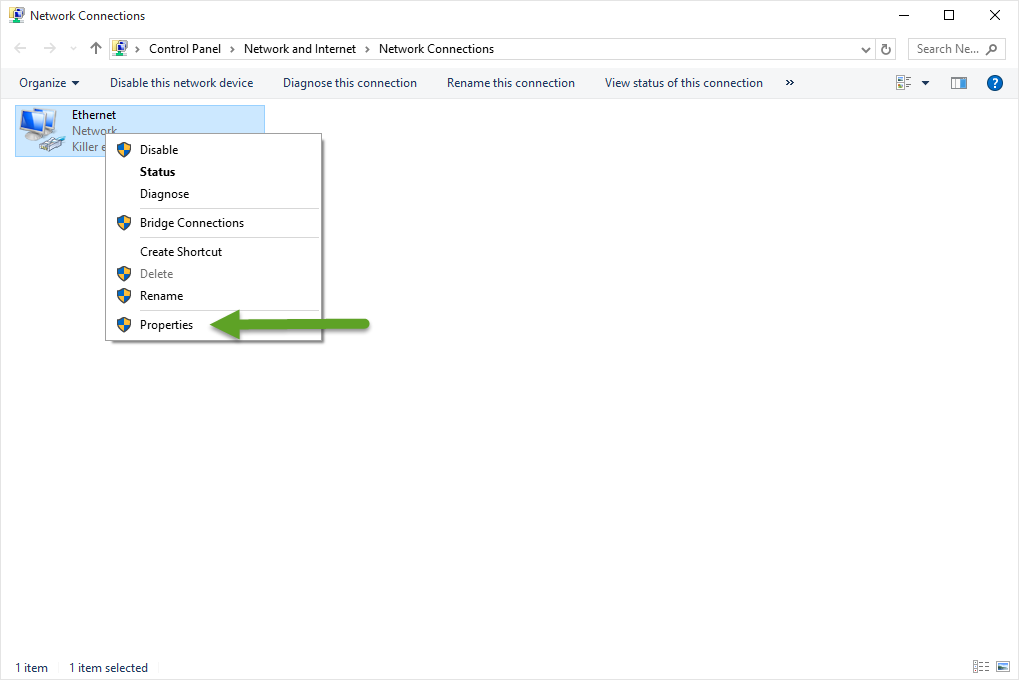
- Right click your network adapter
- Click Properties
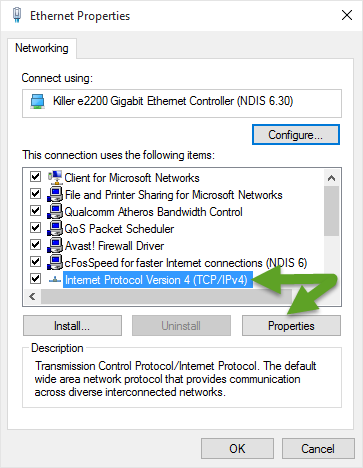
- Click Internet Protocol Version 4 (TCP/IPv4) and click Properties
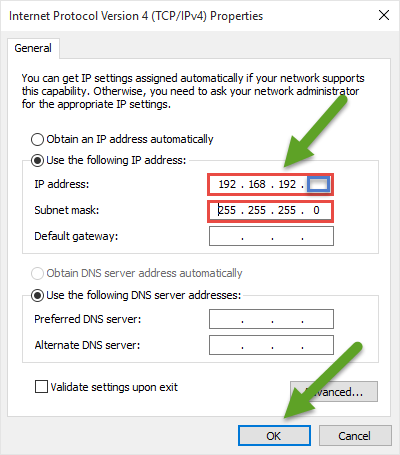
- Click 'Use the following IP address'
- Enter 192.168.192.X (X = any number you wish between 1 - 167)
- Example: 192.168.192.60
- Click into Subnet mask which will automatically populate with 255.255.255.0
- Click OK to save
- Your PC and Printer are now on the same range.
Connect your PC to the Printer via Ethernet cable
- Disconnect your PC Ethernet cable from the network
- Connect the PC network card directly to the printer via Ethernet cable
- Ensure Printer is turned on with no red lights flashing
B. Configuring a new IP address for the printer (if applicable)
- Open up your favourite web browser
- In the address bar enter the following address and click enter; 192.168.192.168/PrinterConfigurationPage/
 (Note: Replace IP Address with the IP Address assigned to the printer by your network)
 - When prompted for login credentials, enter epson into both username and password
- Click TCP/IP under Wired
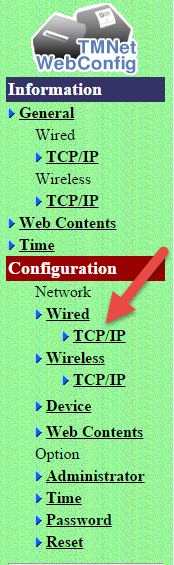
- Change 'Get IP Address' to manual If you used the automated IP Address process in step A.
- Enter the preferred ip address of the printer.
- If your original IP address was 192.168.0.25, then you would enter an IP address in the same range. Example: 192.168.0.91
- Enter the same subnet mask (usually 255.255.255.0)
- Enter the Gateway IP address of your router or server
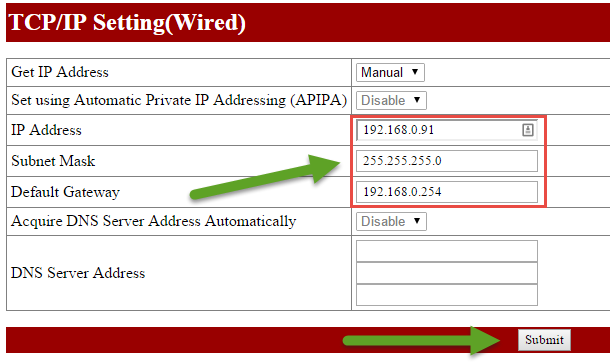
- Click Submit to save
- Close the browser window\
Note: Automated IP Address Configuration users may proceed to C. Verify Printer IP address change and device name. Manual IP Address Configuration users proceed to the next step.
Set PC network card back to default IP address settings
- Click Windows start menu
- Type 'Network and Sharing' into the start menu search box
- Click 'Network and Sharing Centre'
- Click 'Change Adapter Settings'
- Right click your network adapter
- Click Properties
- Click Internet Protocol Version 4 (TCP/IPv4) and click Properties
- Set both sections back to obtain automatically
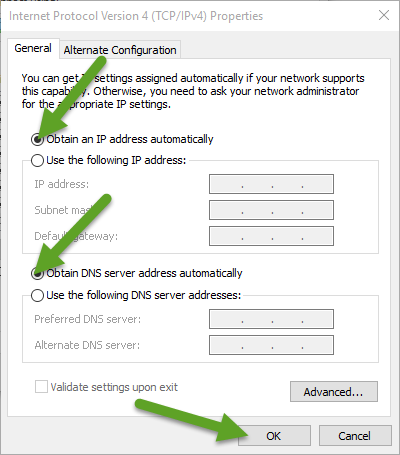
- Click to save
- Close all settings windows
Reconnect Ethernet cable back to router
- Disconnect the Ethernet cable from the printer
- Connect the PC Ethernet back to the router/switch
- Connect another Ethernet cable from the Printer to the router/switch
C. Verify Printer IP Address Change & Device Name
- Open up your web browser
- Entering {New Printer IP}/PrinterConfigurationPage in the address bar
- Example: If you changed the printer IP address to 192.168.0.91, then your printer configuration address will be 192.168.0.91/PrinterConfigurationPage
- Login using same credentials as previous steps (epson for both)
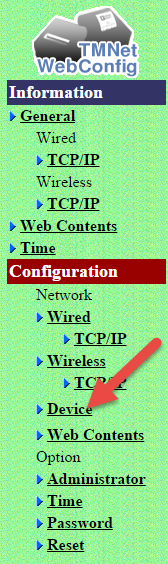
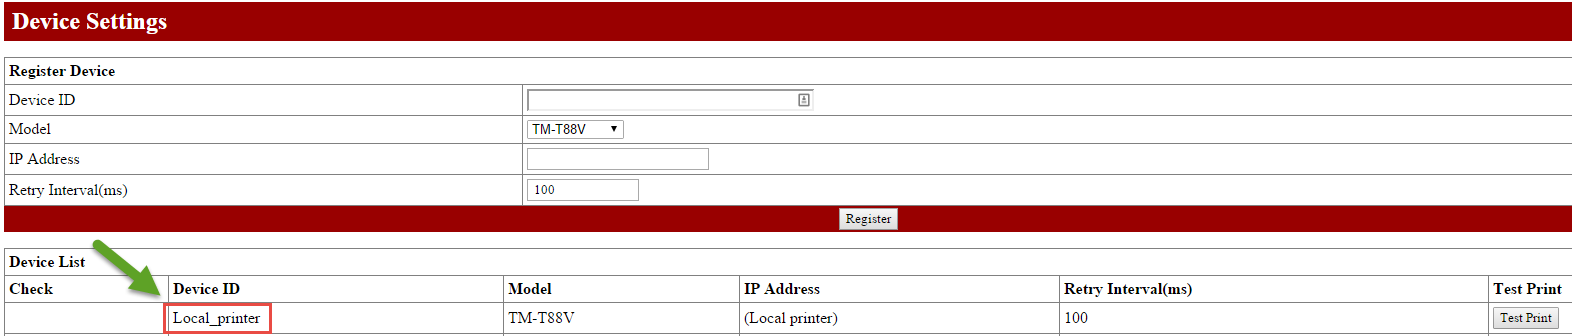
- Click Device - Note that some printers menu may slightly differ from model to model.
- Make note of the printer name/device ID (case sensitive)
- Close Printer configuration page
D. Setup ClickPOS for Intelligent Printing
- Login to ClickPOS
- Navigate to Maintain > System Admin > Intelligent Functions
- Select the relevant branch
- Select Master
- Enter the IP Address of the Intelligent printer
- Enter the Device ID/Printer Name (please note that this is case sensitive)
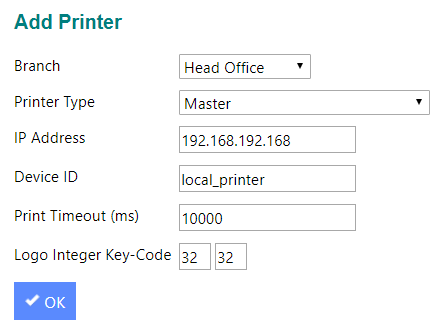
- Click OK
- Master printer is now setup
E. Verify Printer Visibility & Test
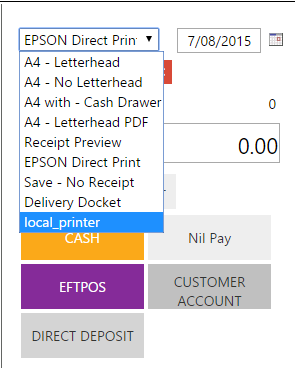
- Navigate to Sale > Sell Product
- Open the printer selection panel and verify the printer is displaying
- Do a test print to verify the intelligent printer is working correctly.